

AWS EKS (Elastic Kubernetes Service) is a managed service provided by Amazon
Web Services (AWS) that simplifies running Kubernetes on the AWS cloud. EKS
manages the Kubernetes control plane, including the API server and the etcd
database, which are responsible for cluster operations, so you can focus on
deploying and managing your containerized applications.
For us, Mulesoft Architects and Developers, EKS is important, as it is one of
most (if not the most) popular options to install Runtime Fabric on an
infrastructure provider (option also known as RTF Bring Your Own Kubernetes -
RTF BYOK).
In this post, we're going to install an EKS cluster from scratch so that we
can use it to install and set up Runtime Fabric on future posts.
Here are the steps we need to follow to get our EKS cluster.
Create an IAM User for the installation
- Open the AWS Management Console
- Go to the IAM service and, under the Access Management section click on users and then Create User

- In Step 1 - Provide a name for your admin user (in our example it will be k8s-admin). No need to provide access to the management console. Click Next

- In Step 2 - Set Permissions choose the Attach policies directly option and select the AdministratorAccess policy. Click Next

- In Review and Create click on Create user
- Once the user is created, click on the user name on the list of users.
- Next, click on the Security credentials tab and scroll down to Access keys. Click on Create access key and then choose the Command Line Interface (CLI). You’ll have to tick the confirmation checkbox and then click Next

- After that click on Create access key
- Lastly, take note of the Access key and Secret access key. We’ll use them in the next steps.

- Copy the access key ID and secret access key, and paste them somewhere safe, we'll need them in the next step.
Configure the Command Line Tools
There's a set of command line tools that we're going to need in
order to create our EKS cluster. Here's the list:
- aws cli - This is the command line utility provided by AWS that allows us to manage resources of our AWS account from a command line shell.
- kubectl - This is the command line utility to manage a K8s cluster from a terminal.
- eksctl - This is the final command line tool that AWS provides to manage EKS clusters. It's the only command line tool that we'll use directly but, in the background, eksctl will use aws cli to connect to our AWS account and kubectl to connect to our K8s cluster.
If you're familiar with these three command line tools go to the
next step. If not, please start from these other posts to get
your command line tools ready:
Provision of the EKS cluster
Open a terminal and connect your aws cli to your AWS account.
aws configure
you will be prompted to provide the following information:
- Access Key ID - key of the admin user we created earlier
- Secret Access Key - secret of the admin user we created earlier
- AWS Region - region where we'll be creating our EKS cluster
- Output format - json
- Run the following command to create the EKS cluster
eksctl create cluster --version=[K8s_VERSION] //
                    --name [EKS_CLUSTER_NAME] --region [REGION] //
                    --nodegroup-name [NODEGROUP_NAME] --node-type t3.medium //
                    --nodes 2 --nodes-min 1 --nodes-max 4 --managed
where:
- [K8s_VERSION] - Version of K8s that will be installed for your cluster. Don't go for the last K8s version available, check first in the Runtime Fabric Release Notes for the higher version of K8s supported by RTF (it won't be the latest K8s version)
- [EKS_CLUSTER_NAME] - The name for your EKS cluster
- [REGION] - The region where you want to deploy your EKS cluster
- [NODEGROUP_NAME] - The name for the nodegroup of the worker nodes in your EKS cluster.

It will take a while, don't expect your cluster to be
ready immediately. You can monitor the installation
process from Cloudformation and see how the stack
created goes.

Once the installation is finished, verify you can see
the cluster with eksctl
eksctl get clustersInstall an Ingress Controller
There are multiple options for your ingress controller - NGINX, AWS ALB, Traefik... In this tutorial, we’ll install NGINX.
From your web browser, navigate to https://raw.githubusercontent.com/kubernetes/ingress-nginx/controller-v1.1.0/deploy/static/provider/aws/deploy.yaml. You’ll get a long response in yaml format with the definition of multiple K8s objects (namespace, roles, deployment, services...). These are all the K8s resources required for the nginx controller.
Copy the content of all of that to a yaml file, for example nginx-ingress.yaml. Then we’ll create all the resources using that file
kubectl apply -f nginx-ingress.yaml
We should get a response with all the resources created:
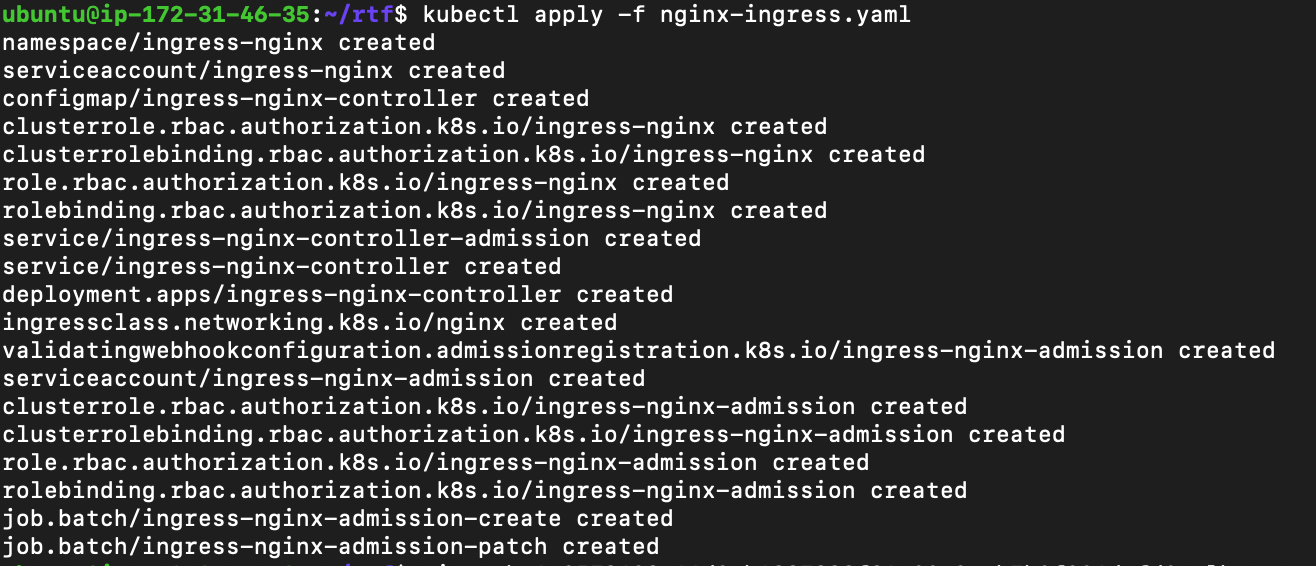
After that, there should be a new Load Balancer in our AWS account.

The installation should have created a new namespace ingress-nginx and a K8s service of type LoadBalancer pointing to our AWS Load Balancer.